Organising your cables (Logisim)
During the first part of the semester, Logisim will be used to create and simulate circuits.
These will become increasingly complex, so this tutorial aims to provide a few tips to keep your circuits readable and understandable.
Setting the scene
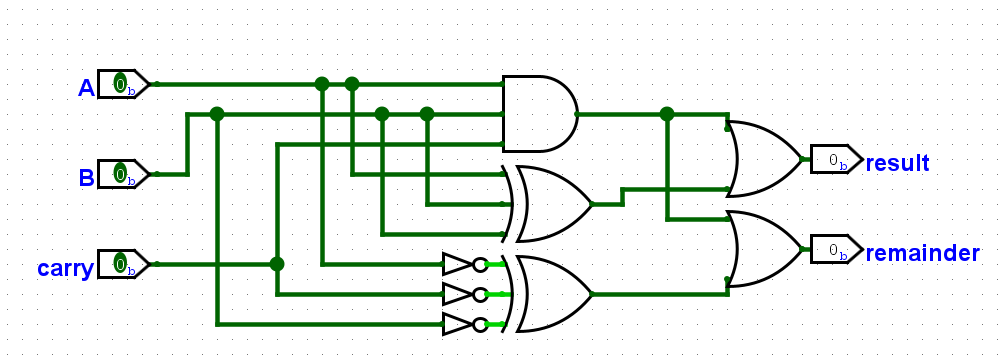
Let's say we want to create a simple bit adder.
We have two input bits, A and B, which are 1 or 0, and a carry which could come from a previous addition in the case of bit-by-bit addition.
The circuit outputs the result as well as the remainder of the addition that has been performed.
Here is a possible implementation :
NOTE
Note that three-input AND and XOR gates are used. Don't panic, these are covered in one of the following tutorials.
The circuit is relatively simple, so it can be understood with patience and concentration. But can it be made easier to understand?
Organising the cables
A technique for making the circuit
- Easier to read
- More appealing and clear (very important)
- Easier to extend, modify and debug
is simply to rearrange the cables. Some example circuits or circuits found online use the following method :
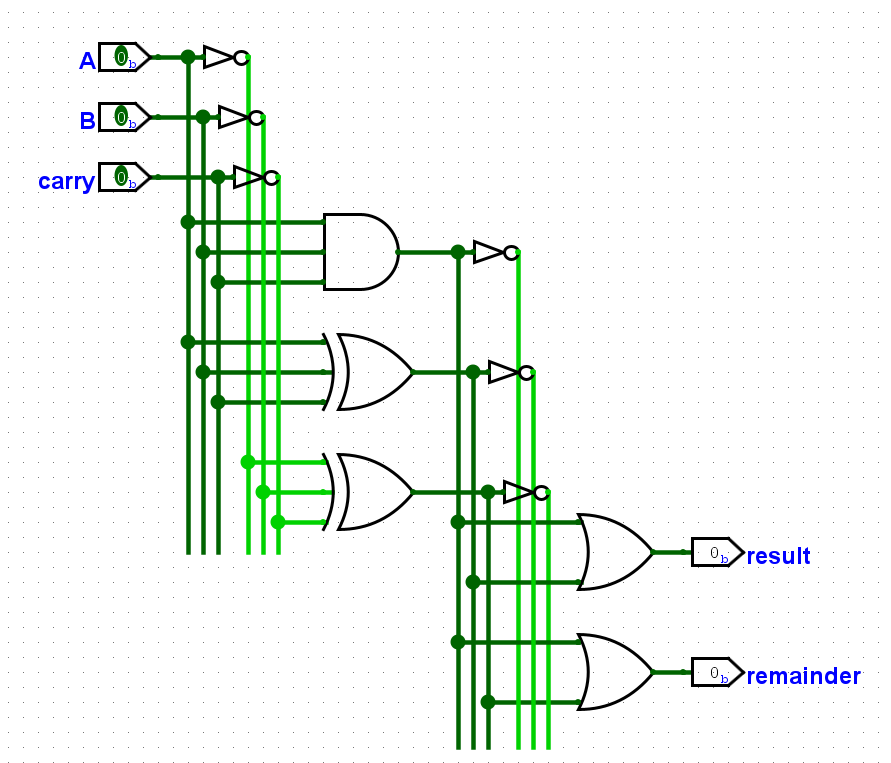
By arranging the inputs on these cable lines, it is easy to see at a glance which input is being used and whether it is its negation.
NOTE
This method is not mandatory unless otherwise indicated by the teacher.
It may, however, become useful in larger projects such as graded practical work.
Wiring error
A very specific error can be encountered if we are not careful, as shown below :
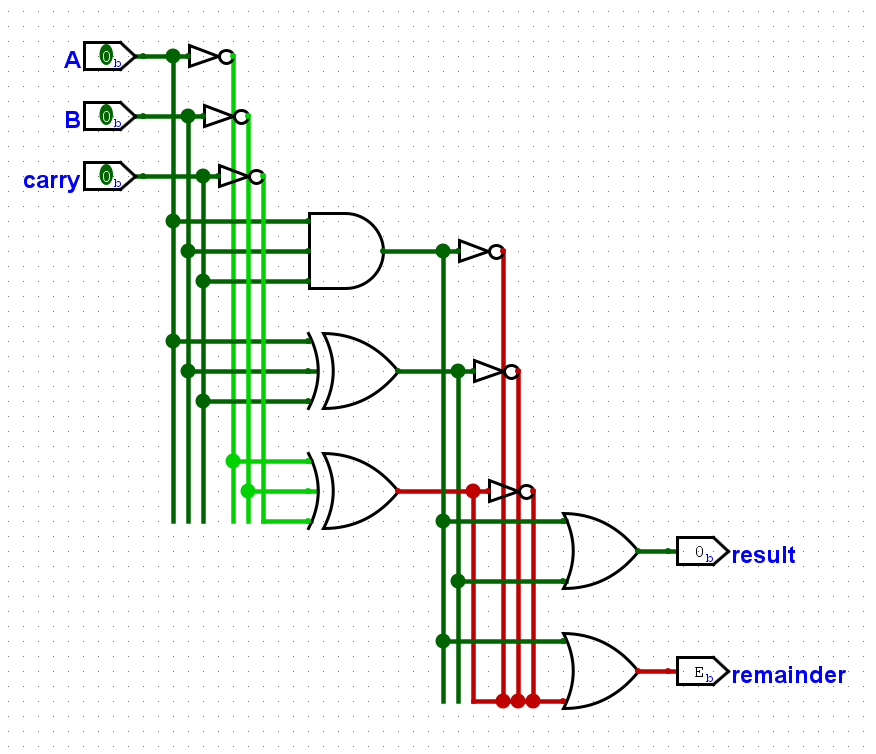
The error here is due to the fact that the cable connecting the second XOR gate to the second OR gate passes over the ends of the three input negation cables. When a cable passes over the end of another cable, the two are automatically linked, even if it was not the intention of the user.
The solution to this is simple : extend the cables downwards by a few more points, in order to move the end lower and avoid contact with the other cables.
Appendix
The Logisim project used for the screenshots in this tutorial can be downloaded via this link.